
Streaming live video on the internet has never been more popular than it is now. Due to the pandemic, events have left meeting rooms and entered computer and cell phone screens. Entire bodies turned into square faces, as we got a glimpse into living rooms and bedrooms of colleagues around the world.
For the ICFJ Global Health Crisis Reporting Forum, available in four languages, we host our webinars on Zoom. To make it more accessible, we also broadcast on Facebook.
This article explains how to use Zoom and Facebook to start a live broadcast, and provides tips to make sure everything goes well during your live event.
No account, no broadcast
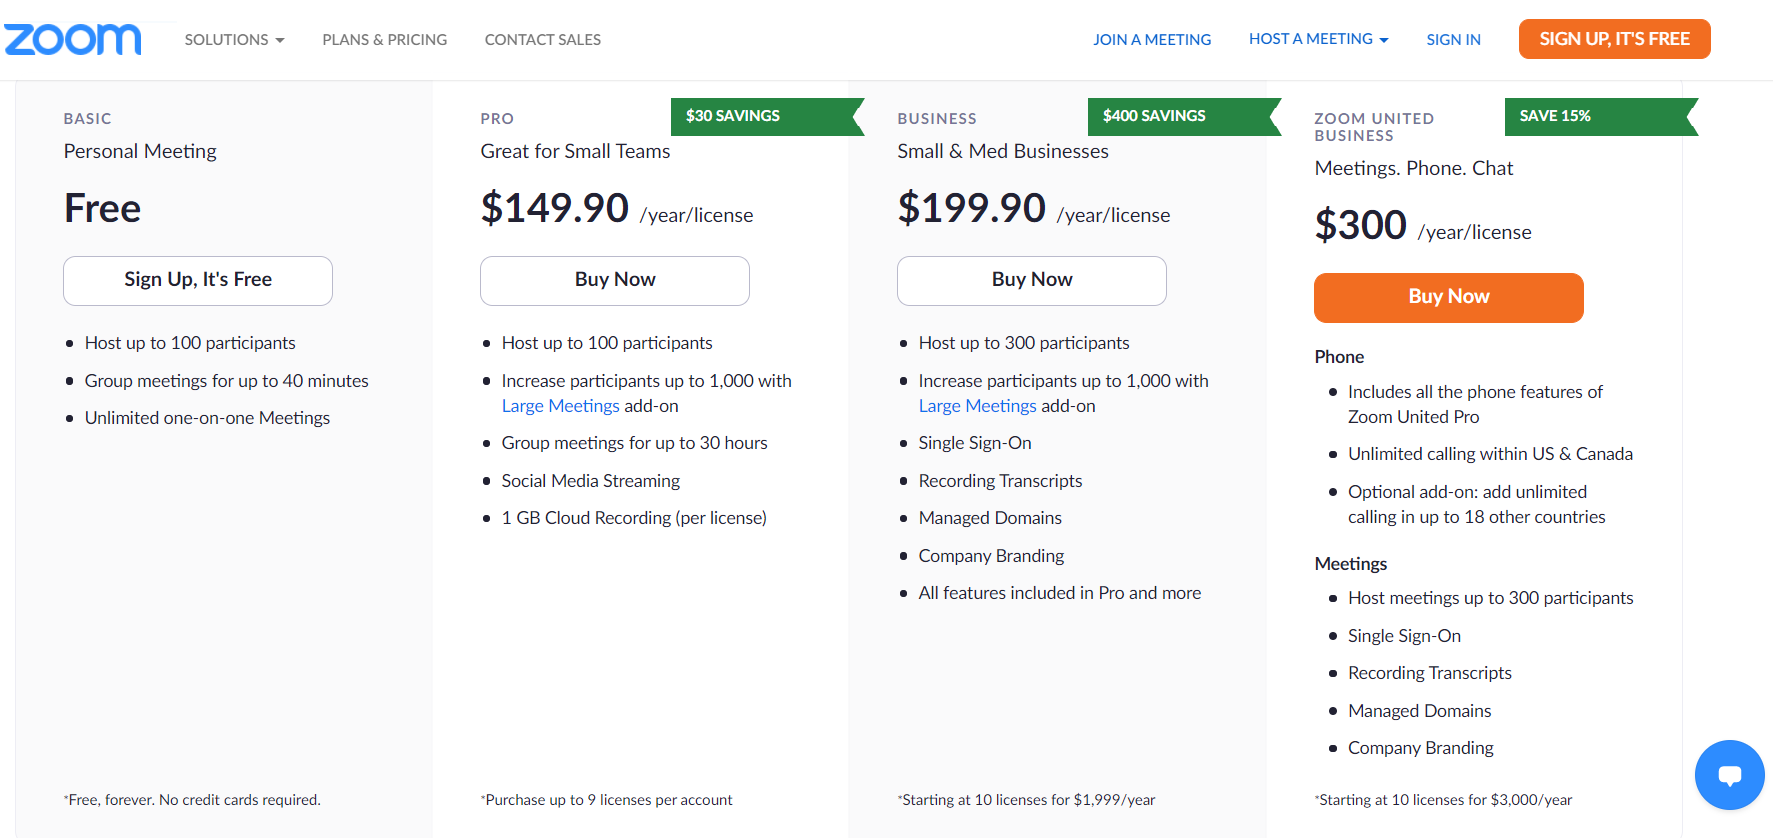
The first step is to create an account on Zoom, which you can do with a Google or Facebook account or email address. Zoom offers a free plan, called basic, as well as other paid versions. The free plan has unlimited individual meetings for up to 100 but it limits meetings to 40 minutes long. This means that the transmission will be interrupted as soon as it reaches the established time limit.
[Read more: What have we learned about distributed newsrooms?]
Advantages of the paid version
Zoom has several paid plans, created for different purposes and types of work. Among the paid versions, the most accessible is the entry plan, named “the professional,” which is our preferred version. It is intended for small teams, and the annual license costs US$149.90. The advantages to this plan include no limit to the number of people in group meetings, an option to record conferences and the ability to broadcast your event to social media accounts like Facebook.
Meeting or webinar?
Zoom has two options for conferences: meetings or webinars. We chose the latter for the Forum. In meetings, everyone can activate their cameras and audio and see who else is in the meeting. In webinars, only the host and the panelists can share video and audio, unless the host gives an audience member permission to start their video and unmute. In webinars, audience members can still interact through the Q&A and chat feature.
Different conferences will meet different needs in your organization. For now, we'll walk through the rest of the steps for a webinar.
Schedule the Zoom event
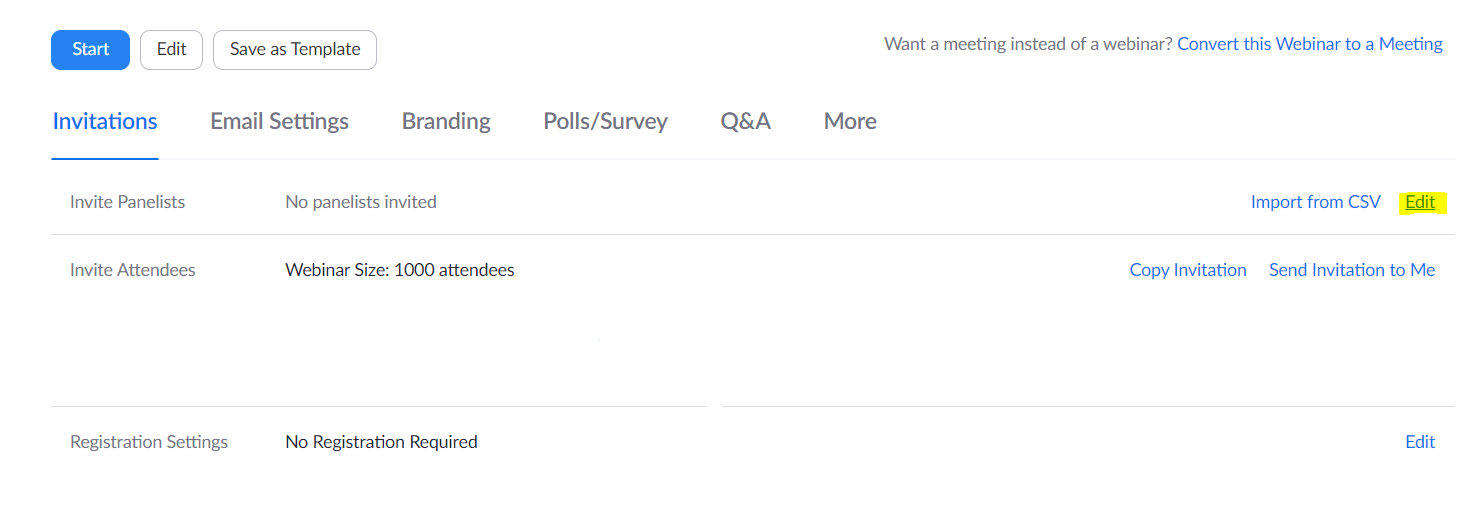
To create a webinar, navigate to "My Account" and select "Webinars" on the left side menu. Start by writing the title and a brief description. Then scroll down, exploring the settings, which have important options such as requesting registration and password from participants and choosing to record — in the cloud or directly on your computer. There is also an option to "Enable Practice Session," which will allow you to meet with your speakers a few minutes before broadcast, which we recommend.
In addition to these choices, remember to include the name and email of the speakers in the “invite speakers” option, which appears after the first page of settings. Let the guest know that they can share their screen, which allows for a more dynamic interaction during the event.
Perform tests
This is perhaps the most important tip: run a few tests. You can explore the settings, make adjustments and anticipate possible difficulties during the official event. Check the position of your camera, whether or not the lighting is good and the quality of the audio. Through a test you can also explore the stages of transmitting an event via Facebook, which is a little less intuitive.
Live and in color
To start the transmission, log in 10 minutes early on the Zoom website or application, and click start. If you have enabled a practice session in your settings, this will open the room to the speakers. This is the time to make necessary adjustments like adding some information in the small rectangle where the names of the speakers will appear.
Make sure the lighting is good: it should not come from the person's back and thus darken the lighting on their face. Listen to see if the audio is good: headphones with a built-in microphone are recommended. Make sure the microphone is positioned toward the speaker and that the microphone chord does not scrape on clothing. This causes a loud and grating noise for those who are watching.
Take the opportunity to talk to the speakers and check if they have any questions about the format of the event. Remember to notify the guest and the participants that the broadcast will be recorded ― a setting established when creating the broadcasting event in Zoom. The warning becomes even more important if you post the video on YouTube later.
[Read more: Tips for podcasting during a pandemic
Lights, camera, action
To broadcast on Zoom, simply hit the "broadcast" button from your practice screen. This will allow participants to join on the platform.
Then, to go live on Facebook, click on the three dots that appear in the bottom panel, selecting the option "Live on Facebook." Navigate through a series of panels from Facebook to set up your broadcast on the correct page or in the correct group. This process takes a couple minutes, so make sure you build in some time at the beginning to get the broadcast set up.
Public participation
During the broadcast, keep an eye out for questions that may come from those who are viewing the event. If on Zoom, these appear as either chat messages or questions through the Q&A function. There is also the possibility of opening the camera and the audio of the participant who will ask the question.
Some people who are tuning in on Facebook might have questions as well. Make sure you periodically check the comments section of your Facebook video throughout the broadcast.
After broadcast
The live recording is saved either in the cloud or on the computer, as chosen in the Zoom event settings — and sometimes on Facebook if you chose to stream it.
Edit the video file as you like. The most popular video editing software are Adobe Premiere and FinalCut. They offer a lot resources for post-production, but also cost money. If all you need is basic editing, including a few cuts and adding captions, free options are enough. Kinemaster, Shotcut, OpenShot, DaVinci and ObsStudio are some of the best-known options.
Daniel Dieb is a journalist with a focus on science, health and technology. He works for the ICFJ Global Health Crisis Reporting Forum and collaborates with Folha de S.Paulo. He is a member of the Brazilian Network of Journalists and Science Communicators (RedeComCiência).
Main image of the Zoom media kit. Secondary images of Zoom prints.
This article was originally published on our Portuguese site. It was translated to English by IJNet English Opportunities Manager and Portuguese Editor Renata Johnson.